
Monday, January 18, 2016
Designing a New Style of Wire Retainer
One of the things that I haven't used in my chassis builds up until now is motor wire retainers. I like the look of them, but don't care for the cost. Once I have my motor wires all done up neatly, what do I do with the sensor cable? Recently I gained access to a 3D printer, so I thought I would work on a better wire retainer design as a first project. Someone may have already done it, but I have not seen a design that also retains the sensor cable. So I modeled up the design in Solidworks, and printed out the first prototype parts.


Tuesday, January 12, 2016
Project Bad Bunny: Status Complete

This project has taken some time, but I am happy with the end result. The primary goal was a dark and subtle style for this Rocket Bunny FD RX-7, and I think that goal was achieved. I have to give special thanks to P!PES RC Exhaust, who provided the awesome "BigAss CF Muffler" for this build. This is a brand new product for P!PES and I am honored to be a part of the introduction and advertisement for it. As usual the quality is top notch, and the look is distinctive.

Full gallery after the jump...
Saturday, January 9, 2016
Sakura D4: Suspension Blocks and Rear Lower Arms
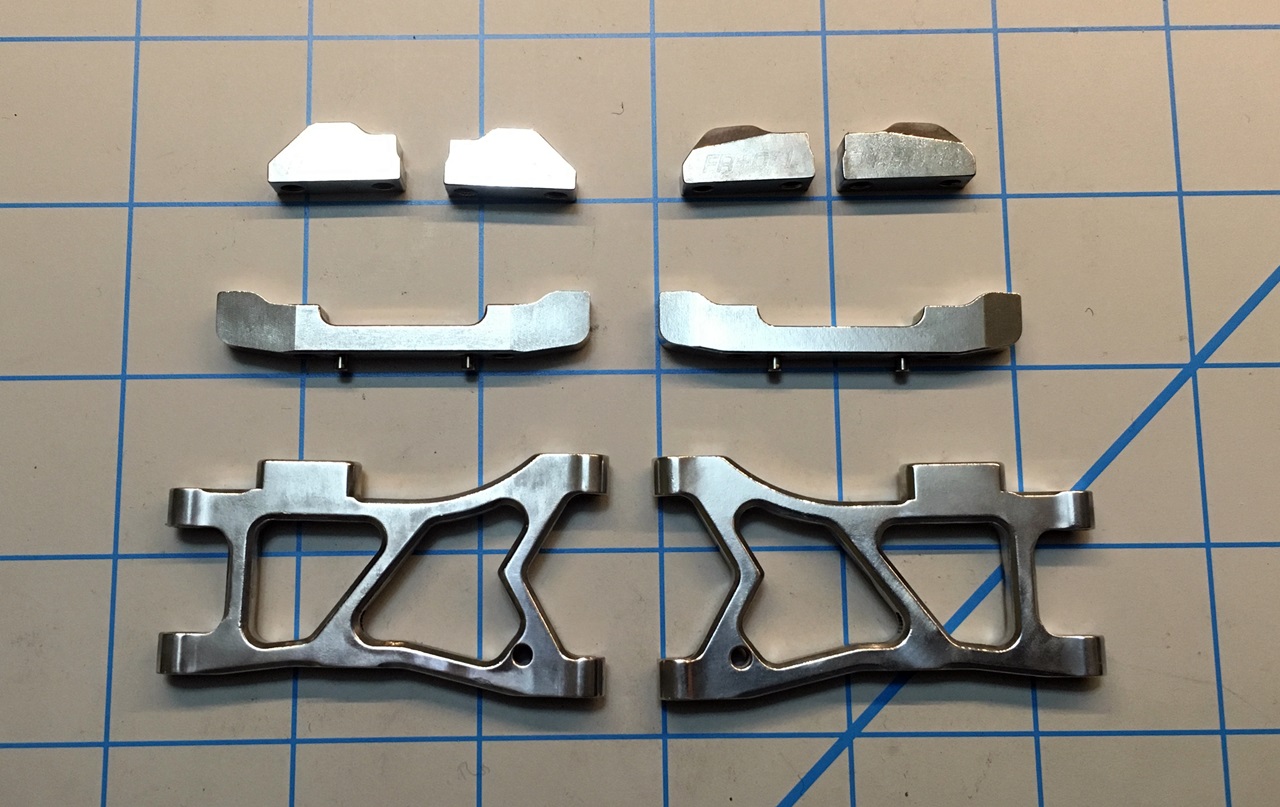
A lot of time has been spent de-anodizing (pink) and polishing aluminum parts on this chassis, and hopefully this will be the last batch for a while. It is really time consuming.

I would have done these mods earlier, but had to wait for some of the parts to be in stock. The suspension blocks are from 3 Racing and the rear arms are Yeah Racing D3 arms. As mentioned in an earlier post, I like the D3 arms because of the narrower track compared to the D4 arms, giving a little more adjustment range by using spacers and/or wheel offset. This is a short term solution while I am waiting for Usukani to release their new rear arm design. Hopefully soon...
Wednesday, January 6, 2016
Sakura D4 + Usukani + Punisher S13 @ Tri Acres
I have been posting about my D4 RWD recently with all the Usukani parts installed, and have been talking about how I am loving the way the car runs. Finally I got a chance to put together some video of it in action at Tri Acres RC Drift Circuit. Here it is in the current state of tune.
Monday, December 28, 2015
Sakura D4: New Dampers, Aluminum Parts, New Gyro, and New Screws
I've really been enjoying the D4 so far, and the more I work with it, the more I like it. 3 Racing made a nice step forward over the D3 and now that factory upgrades are starting to filter through the pipeline, essential upgrades can be completed.

The first order of business is taking care of my main gripe with the stock chassis... steering wipers.

The first order of business is taking care of my main gripe with the stock chassis... steering wipers.
Tuesday, December 8, 2015
Product Showcase: Usukani Tube Style Turnbuckles
One of the interesting products offered by Usukani are these neat tube style turnbuckles. They come in several standard lengths; 23mm, 27mm, 33mm, and 39mm. They also come in the following colors; Pink, Purple, Red, Gold, Tamiya Blue, Yokomo Blue, Silver, and Black. They have internal threads that work with plastic rod ends. Usukani recommends using them with Yokomo rod ends, but I was able to make them work just fine with my 3 Racing parts. I think they will work with other brands as well, but I have not been able to test them personally.
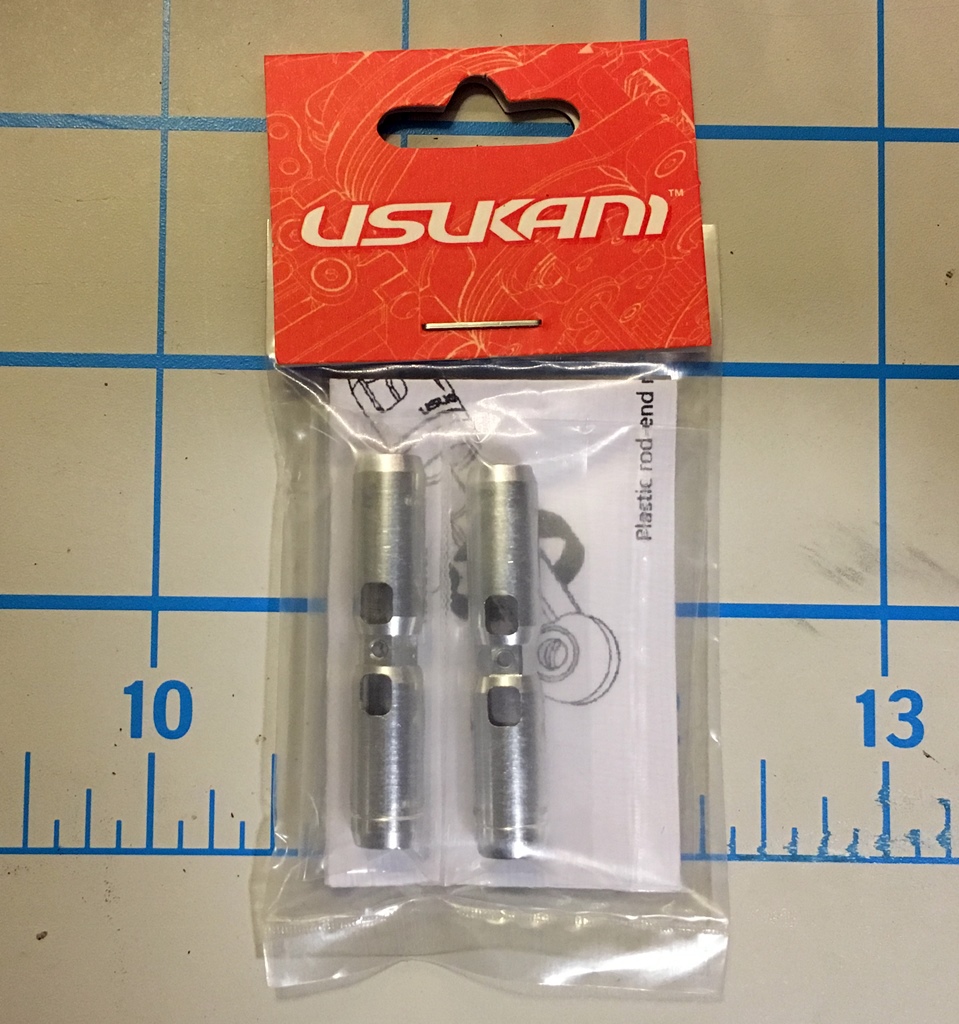
I chose the 39mm Silver version for my Sakura D4 rear upper turnbuckles. As you can see in the comparison with the stock turnbuckle assembly there is plenty of thread engagement, and adjustment range. They should be very strong, too. The turnbuckles can be adjusted with a 5.5mm tool, on the flats, or there are a couple of small holes through the middle that a small hex tool can be used in. There is also an identifying band machined in one end to designate left-handed threads, making it easy to know which way to adjust them.

The Usukani tube style turnbuckles add a nice extra bit of style and functionality to your drift chassis. They should look really good once I have some more aluminum upgrades on my own chassis.

Wednesday, December 2, 2015
Project Bad Bunny: Paint and Starting Assembly.
Work has been moving slow but steady on project Bad Bunny. All the parts are painted and assembly has started. I went with Tamiya PS-23 Gunmetal for the color, and backed it with PS-5 Black to make sure it had a dark hue to it.

The first part to go on was the rear wing. I did that in two stages to make it a little easier. First I attached it at the back with shoe goo. Once that was dry I used body screws for the part that attaches to the trunk.

The first part to go on was the rear wing. I did that in two stages to make it a little easier. First I attached it at the back with shoe goo. Once that was dry I used body screws for the part that attaches to the trunk.
Subscribe to:
Posts (Atom)