Showing posts with label Painting. Show all posts

Tuesday, January 26, 2016

A Tale of Two Body Builds: ABC Sileighty + Addiction BN Sports Part 1

Not long ago I saw a 
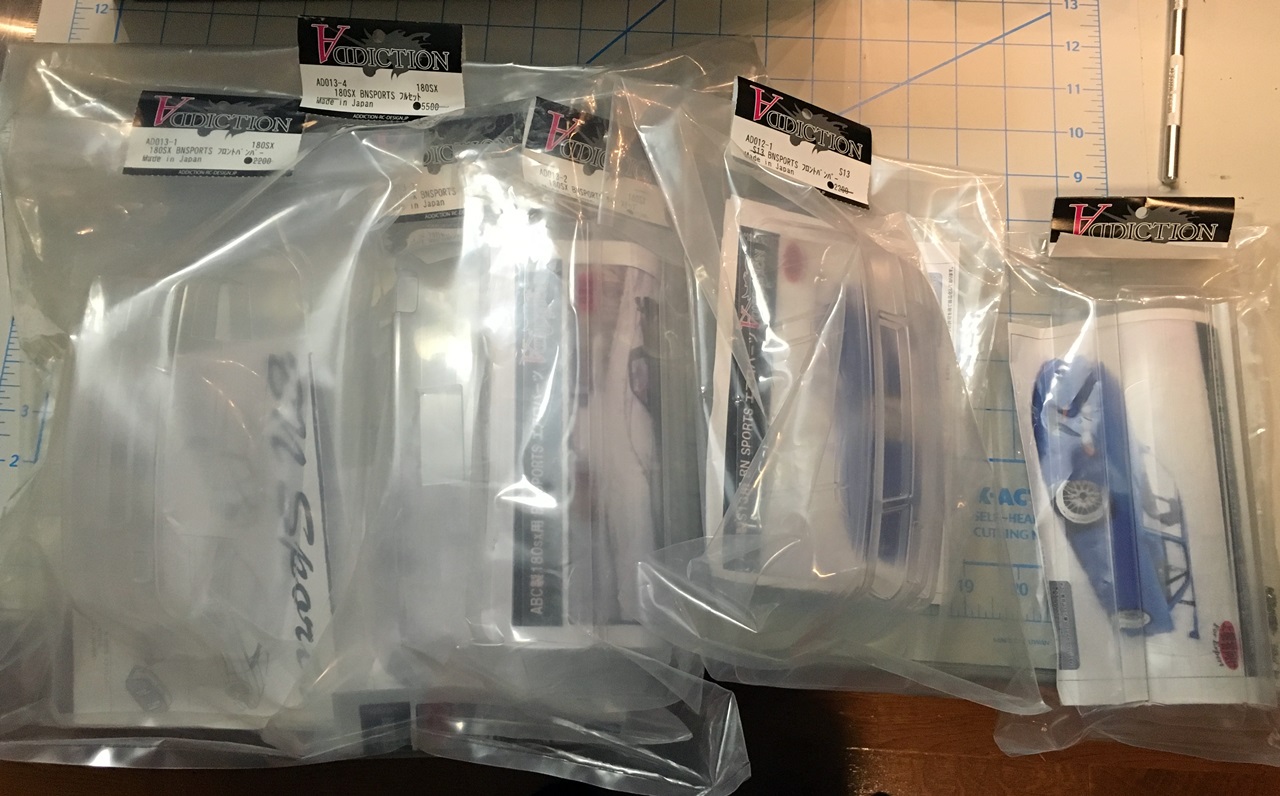
video on YouTube from Street Break Circuit that featured a USDM 240SX Coupe. ABC Hobby doesn't make that particular body, and the one in the video had the front end from the ABC 180SX grafted on. As much as I loved the shell, I could not justify buying two pricey bodies only to cut one up for the front clip. Then after some searching I learned that the pig nose 180SX body came molded as a Sileighty that included a separate nose section with the pop up headlights.

That is when the lightbulb came on and a plan was formed. I ended up buying both bodies to build. The Sileighty is being built first and I intend to put it up for sale once it is completed to offset the cost of getting the parts I needed to do the 240SX. Originally, I was just going to make it a stock version of a Sil80, but the new Addiction RC BN Sports kits kept calling my name, so I picked up those sets as well, and I'm glad I did.


Tuesday, January 12, 2016

Project Bad Bunny: Status Complete


This project has taken some time, but I am happy with the end result. The primary goal was a dark and subtle style for this Rocket Bunny FD RX-7, and I think that goal was achieved. I have to give special thanks to P!PES RC Exhaust, who provided the awesome "BigAss CF Muffler" for this build. This is a brand new product for P!PES and I am honored to be a part of the introduction and advertisement for it.  As usual the quality is top notch, and the look is distinctive.


Full gallery after the jump...

Wednesday, December 2, 2015

Project Bad Bunny: Paint and Starting Assembly.

Work has been moving slow but steady on project Bad Bunny. All the parts are painted and assembly has started. I went with Tamiya PS-23 Gunmetal for the color, and backed it with PS-5 Black to make sure it had a dark hue to it.


The first part to go on was the rear wing. I did that in two stages to make it a little easier. First I attached it at the back with shoe goo. Once that was dry I used body screws for the part that attaches to the trunk.

Saturday, November 7, 2015

Project Bad Bunny: Intro and Body Prep

I am finally getting around to a project that I have been wanting to build for quite a while. The Demi Works Rocket Bunny conversion for the Tamiya FD RX-7 has been in my sights since it first came out. With some other projects out of the way, it is time to get started.


The Demi Works kit is pretty nice overall but, as mentioned by others, the lexan is a little different in how it cuts, so I changed my normal procedure for trimming it out.


Tuesday, September 22, 2015

Project Punisher S13 Part 3: Finished

With all the finishing touches completed, I grabbed a few pics.  I'm pretty happy overall with how this body shell turned out.


Monday, September 14, 2015

Project Punisher S13 Part 1: The Beginning

I've wanted to build and paint a D-Like S13 shell since they first released them.  I finally developed a concept that I liked and went to work.  I think that D-Like has the best looking S-13 on the market right now, and the fact that it comes molded with the great looking BN Sports body kit on it already makes it a great value.  If I had one gripe, besides worthless window masks (ok, that is two gripes), it would be how thin these bodies are in the bumper and rocker areas.  I'm sure it is hard to mold these things, but other manufactures manage to do a pretty good job of it.


Saturday, December 13, 2014

Carbon Effect Hood: HPI RX-8

It takes a little bit if effort, but I really like using the carpet tape method for simulating carbon fiber body panels.  Start things off, by tinting the panel with Tamiya PS-31 "Smoke".  I use 3-4 light coats depending on the desired color at the end.


Next, starts the hard part...The carpet tape is VERY sticky and can be tricky to work with, and apply.  I like to plan all the strips out (it takes multiple strips to do a panel) using paper templates that match the width of the tape roll.  Be sure to make them slightly over sized around the borders of the panels.

Thursday, December 4, 2014

Starting the Painting Process: HPI RX-8

The next order of business is starting the painting process.  For this body, I am using Tamiya Silver as the main color.  It is backed with some Tamiya Black.  I typically like to paint the inside of my bodies with black once the other colors are done.  It helps give it a finished look.


I also started the process for making the carbon fiber hood.  It all starts by using some Tamiya Smoke Tint.  I used 4 light coats to get the shading that I wanted.


The next step is the most difficult part...applying the carpet tape underneath.  I will detail that process in my next post.

New Body: HPI RX-8

I started working on a new body.  It will be for the new Eagle Racing TT02 FRD that I am expecting to be released soon.

After trimming it out with a fresh razor blade, I tape up the things that shouldn't get painted.  The window masks that come with the bodies are usually not very good for producing a quality job.  I like to use the green 3M tape that is used for autobody work.  You can cut a nice edge with it, and the paint does not bleed under the edges like most masking tapes do.


I masked off the hood as well.  I plan on simulating carbon fiber using the carpet tape technique.  I will document that process along the way.